Getting Started with Hive
Welcome to Hive! This guide will help you explore our powerful AI models, get familiar with our platform, and set up your first project. Whether you’re here for moderation or for other use cases, this is the perfect place to start.
Check out our Models on Explore
Take a look at all of Hive's Models on our Explore page!
Many models do not require an Enterprise Plan to get started. You can simply sign up for Hive and play around with the available Playgrounds, completely self-serve.
For Enterprise-only models, please reach out to us and we'd be happy to help enable these models for you!
Some Noteworthy Models to Test
| Use Case | Details |
|---|---|
| Content Moderation (Image & Video) | Try our Visual Moderation Playground! |
| Content Moderation (Text) | Try our Text Moderation Playground! |
| Content Moderation (Audio) | Try our Audio Moderation demo! Playground coming soon. |
| AI-Generated Content Detection | Try our AI-Generated Content Detection demo! |
| Hive's LLM-based Moderation | Try our Moderation 11B VLM Playground! |
If you need help integrating with our models or figuring out what thresholds are right for you, our team is here to help. You can reach us by filling our contact form and we'll get back to you with the right setup for your organization. Let's get started!
Ready for an Enterprise Plan?
Our Playgrounds run on Hive's V3 APIs, which are open for self-serve use—no project setup with Sales required.
- You can test our Playgrounds instantly, at default rate limits.
- Need higher throughput? Contact us by filling out our form to enable an Enterprise project with higher limits.
Get Your API Key (Enterprise)
Once you have the correct models created or enabled for your organization, you can find your API key to integrate by clicking on your desired model in the Projects page.
If you need more help integrating with our V2 API, please visit our Authentication documentation.
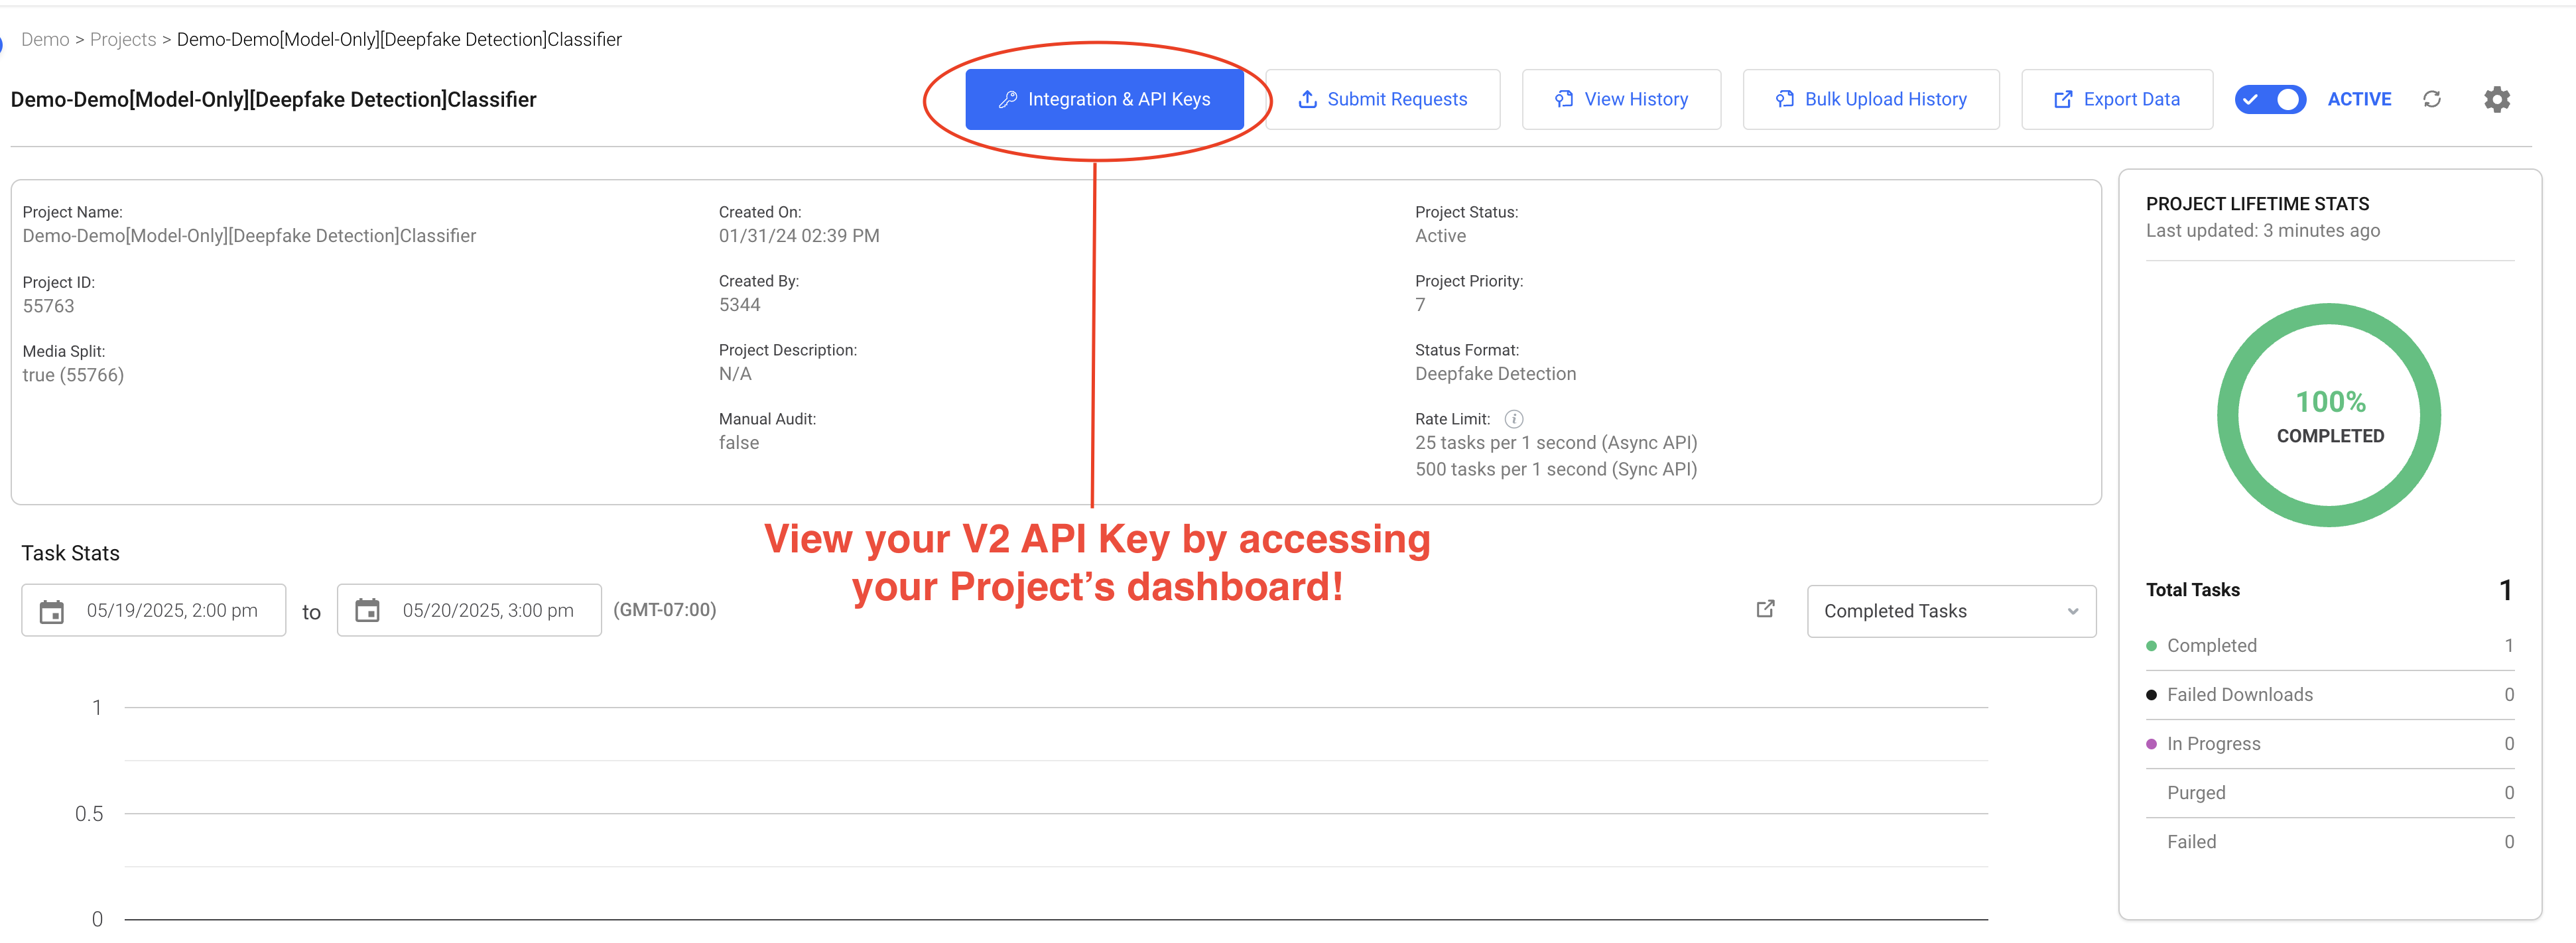
To integrate with our V3 APIs, you can check out the "API" tab in one of our Playgrounds, which includes instructions on how to obtain your V3 API key.
Submit Tasks via UI
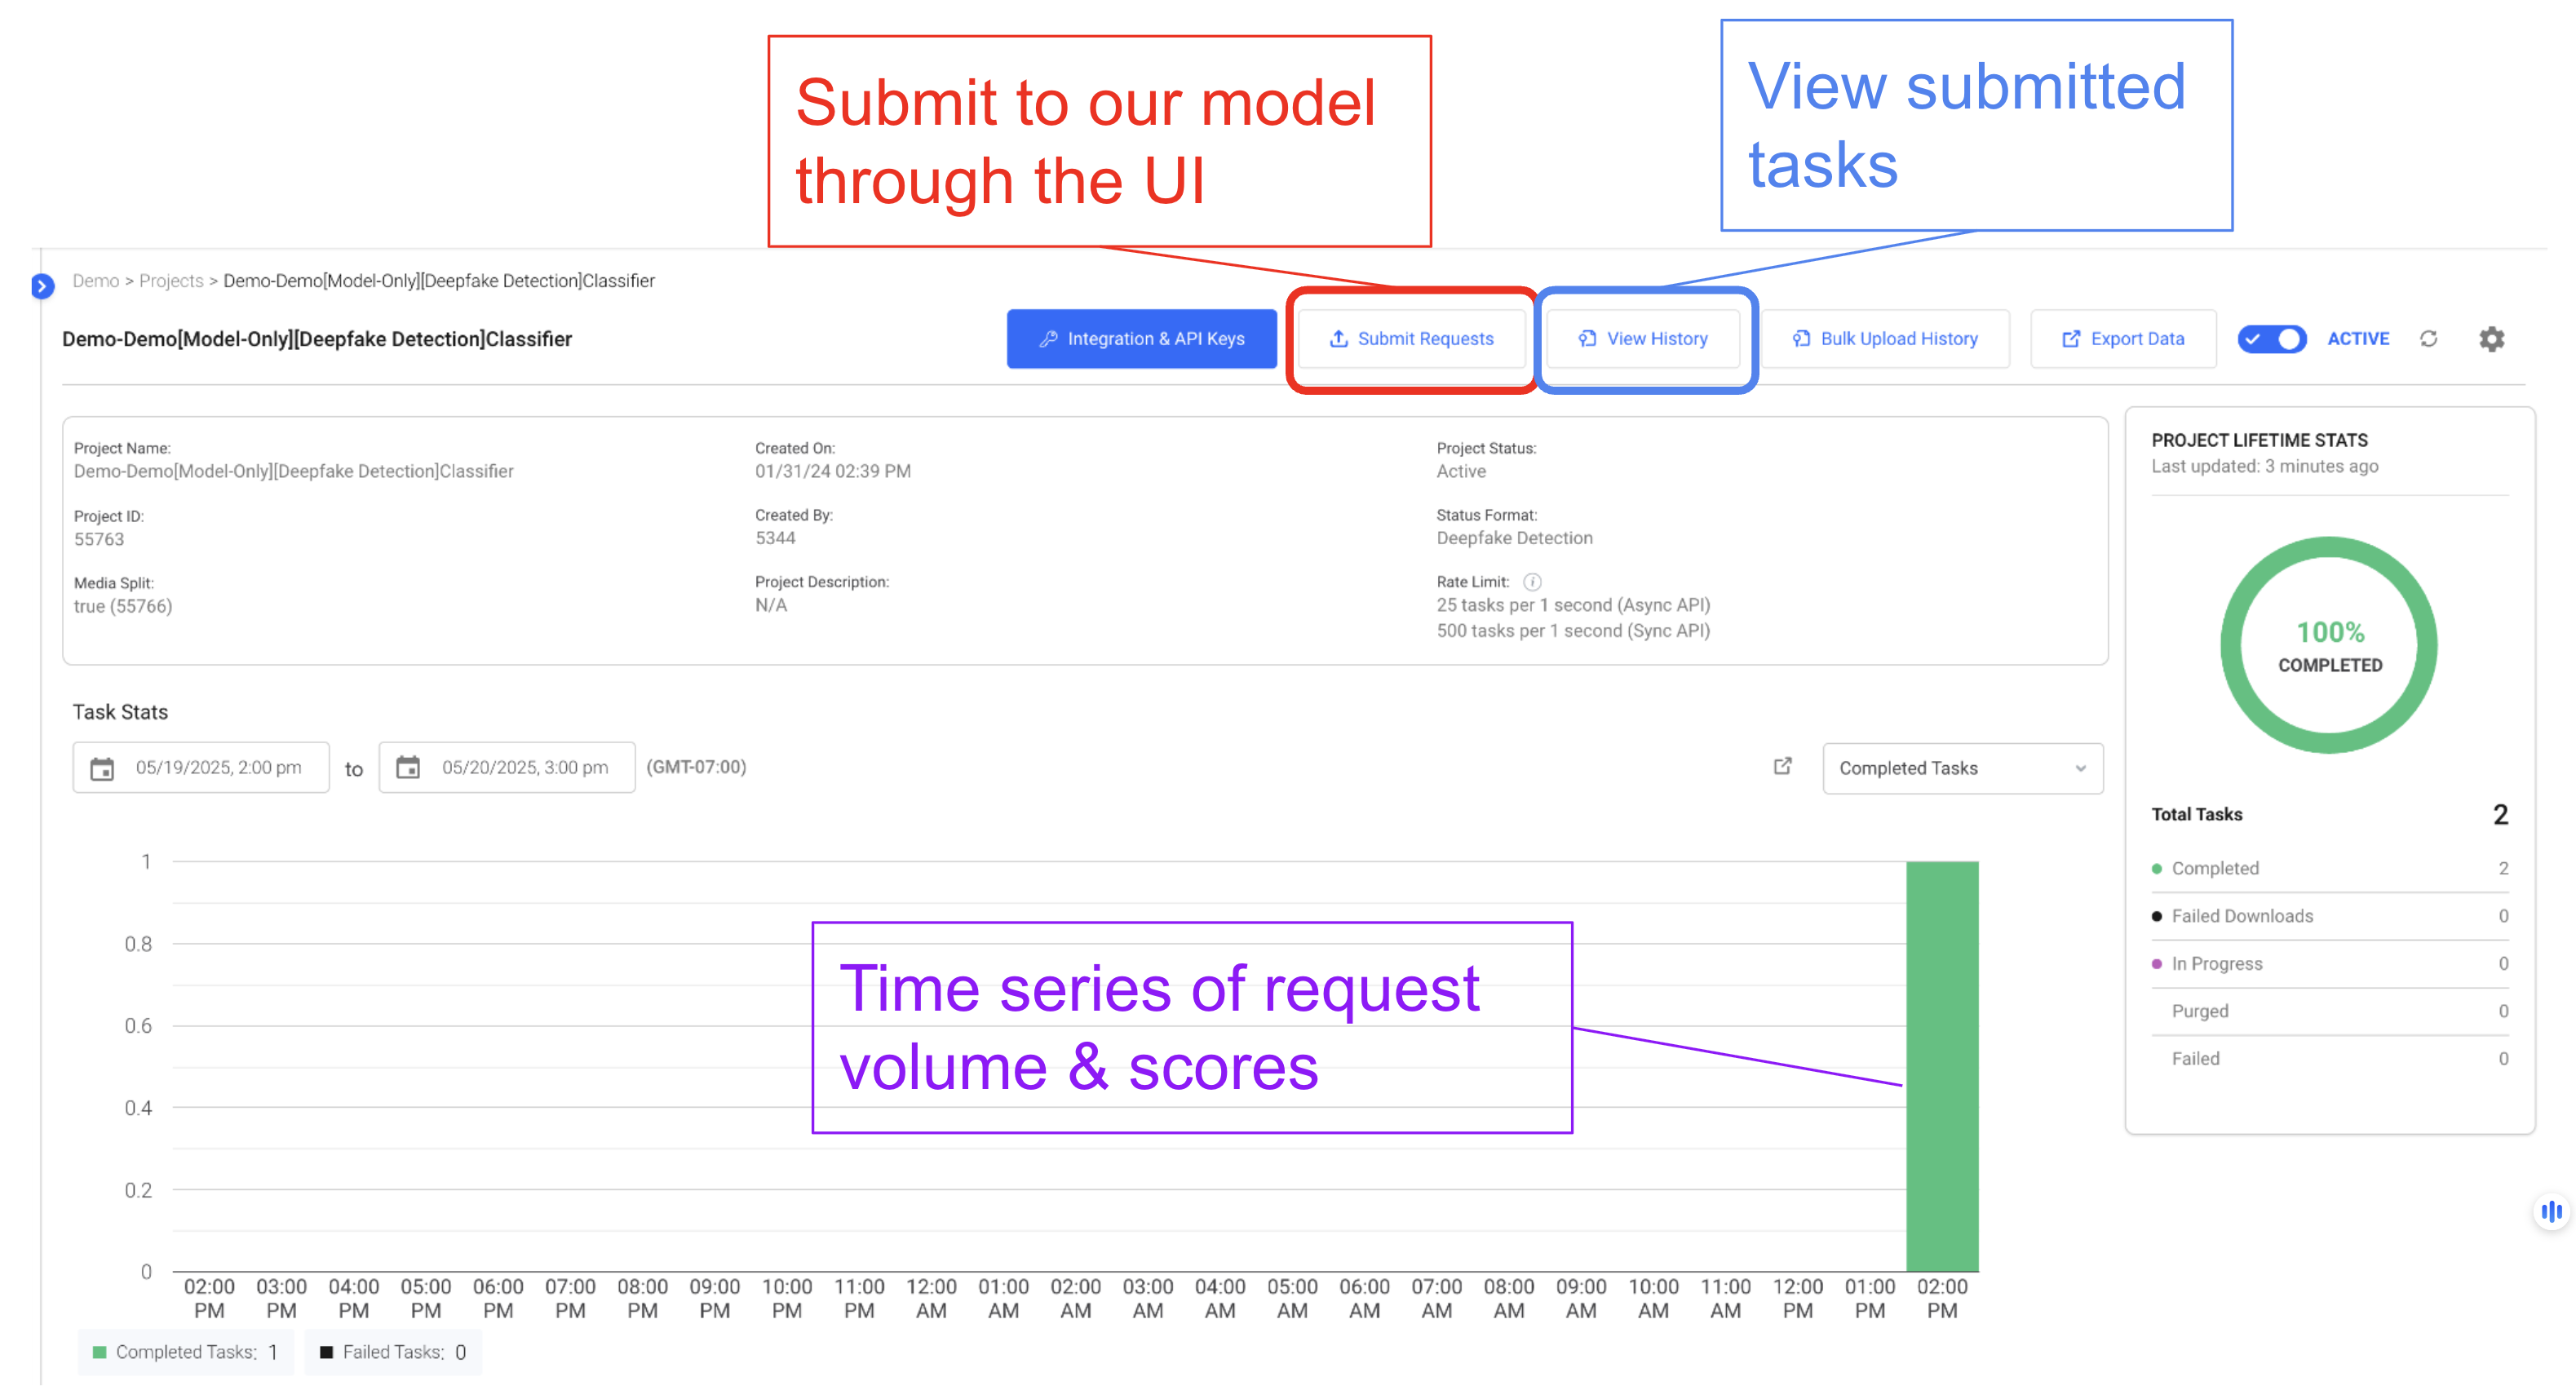
Once you have a project in your organization, you can begin submitting tasks via the UI as well as the API. Clicking on a project after you log in takes you to the project dashboard (as seen in the image below). In your dashboard, you can view statistics about your project, upload data, view previously uploaded data, as well as export your data. There are two ways in which you can upload more data to your project using the UI. Both can be accessed by clicking on 'Upload More Data.'
| Upload Media Files (individual files) | Upload CSV File (Bulk Upload) |
|---|---|
| Drag and drop upload of local media files. Suited for small submissions of 10-100 tasks. | Submit a CSV with public or signed URLs to hosted media files. Suited for medium submissions of 100 - 50,000 tasks. |
Submitting Local Media Files
You can upload several local media files by selecting 'Upload files directly from your computer.' Drag and drop the files you wish to upload and finally hit 'Submit File.' Depending on the project, you can submit images, videos, or audio files.
Acceptable formats for model processing includes:
| Images | Videos | Audio Files |
|---|---|---|
| gif jpg png webp | mp4 webm avi* mkv* wmv* mov* | flac mp3 ogg wav m4a |
* These files may process successfully, but may not playback in all browsers in the UI. These formats will not work with projects that use human labeling.
Submitting a CSV with URLs to Hosted Media Files
The available CSV fields are:
-
URL: This column will contain the public or signed URLs for the media files to be submitted. This column is required if no Text Data (see below) is provided.
-
Callback URL (optional): This column may contain a Callback URL to a server. Results will be posted to that specified URL.
-
Callback Metadata (optional): This column may contain stringified text metadata (i.e. JSON or XML), which will be retained and returned in the task’s results.
-
Task Priority (optional): This column is a priority from 0-9, where 9 is the highest priority, such that you can prioritize different submissions.
-
Text Data (optional): For text models, this column accepts the text string to run through the model. If Text Data is provided, the URL should be left empty.
You must map the columns of your CSV to the respective fields as seen below:
Update Your API
Hive's new Model Update Feature allows you to update your API in your account whenever there is a new and improved model ready for production. You can find this in the Project Settings page.
- please contact your sales rep or api@thehive.ai if you need to move back to an older config
Viewing Task Results in the UI
You can view the results of submitted tasks directly in the UI by selecting 'View data' in the project dashboard. You then hover over the desired task and select 'View Task Details'. On this page you will find details about your task (i.e. Task ID, Callback Metadata, Completed On, etc.). To view the results of the task, you can then click on the 'Results' tab. Here you will find the predictions made on the task.
Exporting Tasks Through the UI
Exporting allows you to generate a CSV containing the results for your tasks. An export request accepts parameters to filter which tasks should be exported. After the export is ready, you may then download it.
Relevant filters include:
- Date Range: Choose all tasks submitted between two datetimes.
- Bulk Upload ID: Only select tasks submitted within a single upload (limited to media files or CSV; tasks submitted via API cannot be found this way). The bulk upload ID can be found in the Upload History tab on the project dashboard.
- Data Columns: Specifies which data fields to export.
a. Task ID: Universally unique identifier (UUID) per task.
b. Image URL: Originally uploaded URL.
c. Original Filename: Name of the locally uploaded file.
d. Status: JSON object with model results.
e. Timestamp (video and audio): Frame timestamp in seconds if the media was split into frames*.
f. Callback Metadata: Any metadata submitted by the user in the Callback Metadata field.
*Depending on the use case, some projects provide exports where each frame is split as an individual row in the CSV, while other projects will provide exports where a single row contains the results for all the frames of a media file.
Admin: Managing Account Permissions
Collaborator: Only allowed to read/write with honeypot and qualifier features (N/A to automated Hive APIs)
Read: Access to view API projects
Write: Read + the ability to upload and export tasks in the UI
Admin/Owner: Write + the ability to update billing information
Updated 17 days ago